CHEESEMAKING 101

Let’s look at how cheese is made. Don’t worry if everything doesn’t make sense right away. I’ll break it down into simple sections. Before we dive in, something that always blows me away is how many different types of cheese can be made from milk. Keep in mind that at each step along the way, the cheesemaker can make small adjustments that result in big differences in flavour, shape, moisture and appearance.
HOW CHEESE IS MADE

A. Chart: How Cheese is Made – An Overview
SUMMARY OF THE CHART: HOW CHEESE IS MADE
STEP 1: Add Cultures to the warmed milk- this is when you can add optional additives like calcium chloride, lipase powder and/or annatto. These ingredients are not necessary to make cheese but they do help.
STEP 2: Add Rennet – this is when you see milk change from liquid to a semi-solid form. Like tofu!
STEP 3: Cut the newly formed curd. This is when you see liquid whey appear in the cut lines. Cutting helps release the whey from the curd, to help the curd become firmer gradually.
STEP 4: Stir the curd and cook it with a slow rise in temperature. This step isn’t necessary for some types of cheese but for other types of cheese such as harder types, you need to stir and heat the curd to make it release more whey even after you have cut the curd.
STEP 5: Drain the curd by a press or by letting it drain naturally. For some soft cheese, you won’t need to press the curd with any weight but for harder cheese you need to press it over time to make it even drier.
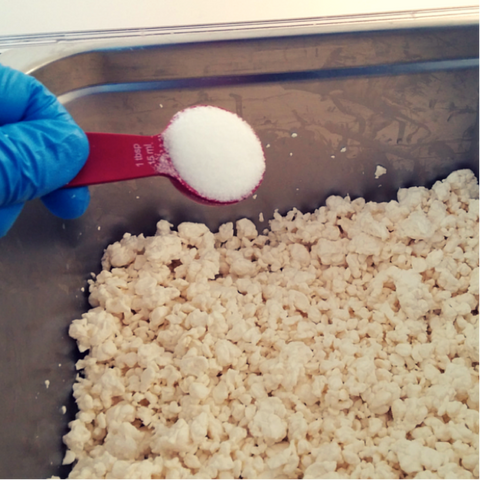
STEP 6: Salt the curd and let it dry. Salt tells the bacteria you added in Step 1 to slow down.
STEP 7: The final step is to age the cheese over time in the proper space that is humid and the right temperature. Aging allows the bacteria to produce more flavour and for a natural rind to develop. This step is not included in the chart because by this point you have made cheese that could be eaten right away.
If you understand the chart, then you can stop reading now.
For more details, keep reading and we will dive in a little deeper...
It all starts with milk, doesn’t it? Poor quality milk will give you poor quality cheese, sometimes even no cheese at all. Let’s first ask an important question…
Why is milk so important?
The short answer is that cheese bacteria cultures love to eat the lactose in milk and produce lactic acid as a by-product; as a result they increase the acidity in the milk. Milk transforms into a versatile food type once it acidifies. So that brings us to…
STEP 1 – ADD CULTURES - Acidification
Another word for acidifying is ripening. Once the milk is warmed up to a favourable temperature, it is 
inoculated with a culture blend of choice. Remember, the bacteria culture’s primary role is to acidify the milk and they do this by eating away the lactose in the milk. Proper acidification is of upmost importance; this is why some cheese makers prefer working with a pH meter. Without acidification, the cheese will be susceptible to problems such as lack of flavour, prone to contamination, will not melt, to name just a few. Sometimes cheese is made without using cheese cultures and instead alternative food acids are used such as: citric acid, vinegar, lemon juice and tartaric acid. With these acid options, you’ll end up making soft cheeses like paneer, Queso Blanco, mozzarella or mascarpone.
Lastly, it’s important to know that Mother Nature will naturally acidify milk over time with nothing added to the milk. The natural bacteria found in milk will ripen the milk slowly and your milk will curdle…this is what we call ‘spoiled or rotten milk’ - it tastes sour and off in flavour. We haves all had the experience of smelling milk that has gone ‘bad’ in the fridge. So the point I am making here is that by adding the bacteria culture of your choice, you are steering and directing the milk in the right direction. You are essentially telling the milk to develop flavour on your own terms; you are controlling the breakdown of the milk so that it ripens the way you want it to.
THE ‘SLOW WAY’ VS THE ‘FAST WAY’
The important thing to think about is that there are two ways to create acid…. either 1) By the lactose loving bacteria or 2) by adding acid like citric acid. I call these the slow way or the fast way of making cheese.
For example, mascarpone can be made by adding tartaric acid or by adding cultures to work their magic over night. Another example is mozzarella; it can be made in an hour using citric acid or the made the ‘slow way’ (using bacteria Choozit TM 81 LYO 50 DCU). Some cheese types can only be made the ‘slow way’ and you don’t have the option to speed things up by adding a stronger food acid.
ADD MILK ADDITIVES
We are at STEP 1 - the milk is still liquid at this point. On some occasions, you may want to add additives to give the milk an extra kick in order to produce the results you are looking for.
These ingredients are added at the same time as the cultures before Step 2 – Add Rennet.
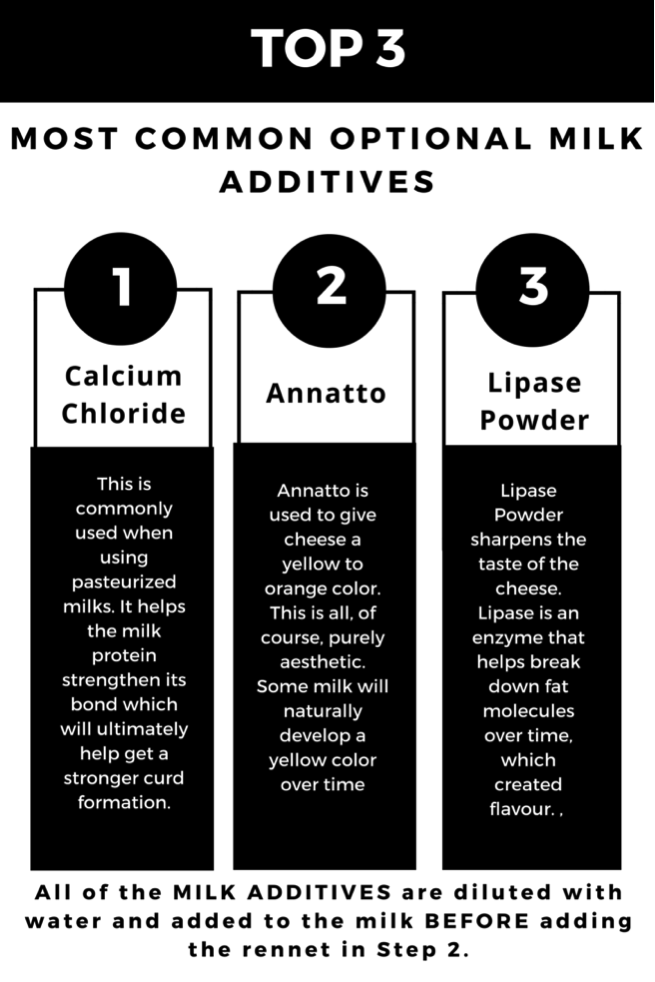
B. Chart: Top 3 Most Common Optional Milk Additives
|
CALCIUM CHLORIDE
|
ANNATTO
|
LIPASE POWDER
|


Remember, all we have done to get to this point is, warm the milk, add cultures and you may or may not have added additives.

Photo: Here's what they look like...
1. RENNET - you'll use this in the next step
2. CULTURES
3. CALCIUM CHLORIDE (CaCL2)
4. SALT - you'll use this later
STEP 2 – ADD RENNET - Coagulation
This is when the magic happens…your milk will turn from a liquid into a semi-gel like state!
Rennet is an enzyme. You add rennet last because your rennet wants to knit your milk together to form a solid mass – so if you kept adding ingredients to the milk after the rennet was added you would be stirring the milk and breaking up the bonds that rennet was forming in the milk. When rennet is added, the milk should not be moved or stirred. Milk should be still for about 45 minutes on average
Trivia: There are cheeses called lactic cheeses that requires no to very little rennet to be added to the milk. All you need to make this type of cheese are cultures and time.
STEP 3 – CUTTING

Wow, your milk changed from milk to semi-solid state in Step 2. Isn’t that cool?! Now you have a pot full of curd. In order to release some moisture inside your curd mass, you need to cut the cheese. Yes, I just said cut the cheese;)
The size and consistency of the curd will dictate how consistent the texture will be, either moist or dry. It is really important not to tear or squeeze the curd mass, you don’t want to force the whey out while it’s still at a fragile state.
The idea is to help the whey expel naturally on it’s from the cut lines you make with a long knife. As you become a more experienced cheese maker you can experiment with cut sizes outside the suggested curd size in the recipe and see what kind of results you get.
STEP 4 – STIRRING AND COOKING

After cutting, it is normally time to stir and cook – when I use the word ‘cook’ it means to heat up the curd inside the pot. The reason for stirring is to help the curd cubes keep on expelling whey. While you stir, keep in mind that all you want to do is to let the curds float in the whey and bump into each other.
Just like the cutting stage, try to avoid squeezing or forcing the whey out of the curd. So it’s finding a balance of expelling and keeping small amounts of moisture in the curd that will make a successful cheese.
Cooking the curds is necessary to help them become more resistant to pressure and actually help keep some whey inside the curd. During this process, the bacteria cultures stay active as they continue to acidify their environment. The acidity level in the cheese before you proceed to the next step is really important. This whole step is usually done by continually stirring and raising the temperature of the curds and whey at a very slow rate. Cooked enough? Whey expelled enough? Acidity high enough? This step covers it all and mastering it is probably the toughest challenge in the early stages of cheese making.
When making most cheese types, you’ll need to stir and cook the cheese. Some cheese like soft cheese doesn’t need to be stirred.
Photo above: See how with gentle, gradual stirring that the curds shrink and become firmer over time
STEP 5 – DRAINING
Draining sounds simple enough, but on a micro bacterial level, you might be doing it too soon or too late. You want to make sure that the whey is drained enough before pressing (if your cheese is a pressed cheese).
*Note: some cheese types such as gouda require a “pressing-under-whey” step before draining the cheese. This is to help prevent the formation of excessive mechanical holes in the body (paste) of the cheese. Mechanical holes are the holes you typically find in cheeses such as Havarti.
Placing curds in mould

The most common question at this stage is “why do I need cheesecloth?” Cheesecloth is an integral part of the pressing process otherwise the curds will just seep through the mould holes with the added pressure of the pressing process. In order to avoid creases in the cheese paste and on the rind make sure the cheesecloth is nice and taut before pressing.
Pressing
The first rule of pressing is to make sure the curds are drained enough in order to avoid whey trapped in cracks inside the paste. Pressing depends a lot on the cheese you are making, how well cooked curds are before draining, how warm or cold the curds are when you first start pressing and also how warm the ambient temperature is.
STEP 6 – SALTING/DRYING
Without salt, there’s no way to keep your cheese in the refrigerator for extended periods. Salt provides flavour enhancement and extended shelf life. And remember those bacteria cultures? Salt slows them down from producing too much acidity.
Drying
Aren’t we all impatient at this step? At this point we have successfully made a cheese. Before aging, the cheese must now air dry for a few days. One of the most common mistakes made by new cheese makers is to not let the cheese air dry properly. The cheese needs more time to expel whey and this step cannot be accelerated.
We have just covered the general guiding principles of cheesemaking.
You can modify each step along the way to change the cheese type and flavour. For example the type of cheese culture you use changes the flavour and the cheese. Another example is, how many cuts you make in the curd will change the how dry or moist the cheese will be. A Parmesan for example needs many cuts, a long period of stirring and heating and a long aging time. Compare a Parmesan with a soft cheese, that needs very little stirring, low heat and no aging time. So at each step, small adjustments make a all the variety of cheeses in the world.
Glad you have learned the basic principles of cheesemaking!


